To keep your controller clean, focus on hidden grime spots like crevices around buttons, thumbsticks, and grips, which trap dust and oils. Don’t forget tiny areas such as button bores, trigger zones, and joystick bases that can harbor dirt, affecting responsiveness. Ports, edges, and textured surfaces also collect debris. Using small brushes, compressed air, and isopropyl alcohol, you can effectively clear these hidden spots. Keep your controller in top shape by staying vigilant—explore the details to guarantee spotless performance.
Key Takeaways
- Focus on cleaning thumbsticks, buttons, and surrounding areas where oils, sweat, and crumbs accumulate regularly.
- Use soft brushes, compressed air, and cotton swabs with isopropyl alcohol to reach tiny crevices and ports.
- Regularly inspect and clean joystick bases, button bores, and trigger mechanisms to prevent grime buildup.
- Clear dust and debris from ports and connection points with compressed air and avoid liquids.
- Establish monthly cleaning routines and store controllers properly to prevent hidden dirt accumulation.
Common Areas Where Dirt Accumulates
Many common areas tend to collect dirt and dust over time, especially in places you frequently touch or pass through. Your controller’s thumbsticks and buttons are prime spots for grime buildup since they see constant use. A new layer of microbial contamination can develop if not cleaned regularly, which could pose hygiene concerns. Regular cleaning not only maintains the appearance but also reduces the risk of germ transfer, making your gaming sessions safer and more hygienic. The surface around the D-pad and action buttons also traps dirt from sweaty hands or crumbs. Additionally, high-touch surfaces can harbor oils and dirt from regular handling, making them particularly prone to grime accumulation. The edges and seams of the controller are often overlooked but can harbor dust and debris that settle into tiny crevices. Even the grips can accumulate oils and dirt from regular handling. These areas may look clean at first glance, they’re often hiding invisible layers of grime. Regularly wiping down these high-touch zones with a damp cloth or gentle cleaner helps keep grime from building up and assures your controller stays fresh and hygienic. Additionally, incorporating proper cleaning techniques can effectively maintain the longevity and hygiene of your device. Recognizing the importance of regular maintenance can prevent long-term damage and ensure your controller remains in optimal condition.
The Crevices You Might Overlook

You might miss dirt hiding in tiny crevices and hard-to-reach spots on your controller. These hidden areas can trap dust and grime that quickly accumulate over time. Paying attention to these overlooked spaces guarantees a thorough clean and better controller hygiene. Incorporating techniques like free floating cleaning methods can help dislodge debris from difficult spots. Additionally, utilizing European cloud innovation principles can inspire creative approaches to maintaining device cleanliness and sustainability. Embracing precision cleaning techniques ensures no area is left untouched during your maintenance routine.
Hidden Dirt Accumulation
Even though crevices and corners often seem clean, they can hide stubborn dirt and debris that regular wiping misses. Dust, oil, and grime settle deep where your cloth can’t reach. These hidden spots accumulate buildup over time, affecting your controller’s hygiene and performance. To combat this, use a toothpick or a soft brush to dislodge debris from tight spaces. Here’s what to focus on:
| Area | Dirt Type | Cleaning Tip |
|---|---|---|
| Joystick crevices | Dust and oil | Use a cotton swab dipped in isopropyl alcohol |
| Button gaps | Dirt and grime | Gently scrub with a soft-bristled brush |
| Side panels | Dust buildup | Wipe with a slightly damp cloth |
| Under triggers | Debris and oil | Carefully remove with a toothpick |
Additionally, paying attention to dirt accumulation in these areas can significantly improve overall controller maintenance. Regularly inspecting and cleaning dust and debris in hard-to-reach spots can prevent long-term buildup. Being aware of hidden dirt can lead to more effective cleaning routines and extend the lifespan of your device.
To ensure thorough cleaning, consider using specialized tools designed for precision cleaning, which can help access those tricky spots more effectively. Properly cleaning these hard-to-reach spots not only keeps your controller looking new but also helps maintain optimal performance over time.
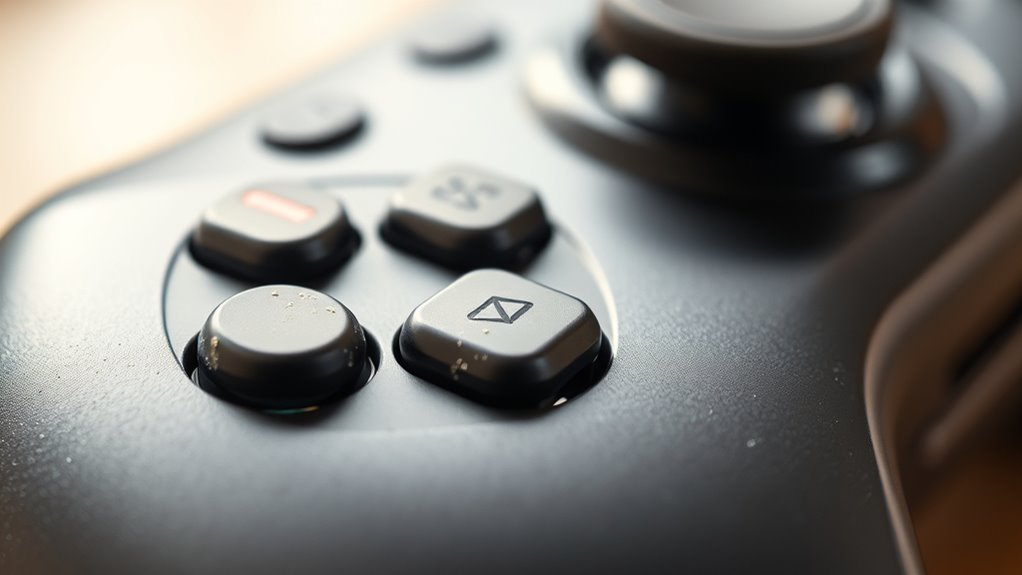
Hard-to-Reach Areas
Reaching into tight crevices can be tricky, but it’s essential for thorough cleaning. Small gaps around buttons, thumbsticks, and between controller parts trap dust, dirt, and grime that you might overlook. Use a soft-bristled brush, like a toothbrush, to gently dislodge debris from these tight spots. Compressed air can also help blow out stubborn dirt in hard-to-access areas. For stubborn grime, lightly dampen a cotton swab or cloth with isopropyl alcohol and carefully clean around edges and inside crevices. Avoid excessive moisture to prevent damage. Regular attention to these hidden spots ensures your controller stays clean, functioning smoothly, and looks good. Additionally, understanding the importance of controller maintenance can help you keep your device in top shape. Cleaning these tiny spaces prolongs your controller’s lifespan and improves your gaming experience. Paying special attention to support breakfast practices like regular cleaning can help keep your gaming equipment in optimal condition.
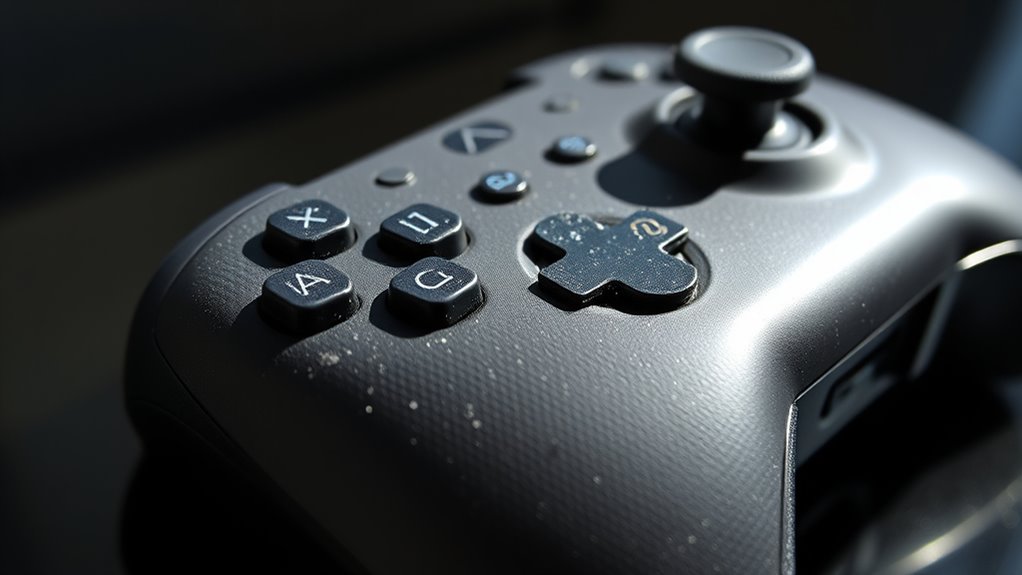
Buttons and Their Hidden Bores
Many buttons on game controllers hide small, hard-to-see bores that can trap dirt and debris over time. These tiny openings, often overlooked, collect grime from your fingers, dust, and sweat, which can impact button responsiveness. To clean them, use a toothpick or a small brush to gently dislodge dirt from the bores. Compressed air works well to blow out loose debris without pushing dirt deeper inside. Dampen a cotton swab with isopropyl alcohol and carefully wipe around the button edges and into the bores to remove stubborn grime. Avoid applying excessive liquid that might seep into the controller. Regularly cleaning these hidden spots keeps your buttons functioning smoothly and prolongs the overall lifespan of your controller. Proper maintenance can prevent the buildup of grime and ensure consistent performance over time. Additionally, incorporating routine inspections of these small openings can help catch dirt accumulation early before it affects functionality, especially considering that dirt buildup can be exacerbated by environmental factors. Performing preventative cleaning regularly is key to maintaining optimal controller performance.

Triggers and shoulder buttons often develop buildup zones where dirt, oil, and sweat accumulate over time. This grime can hinder smooth operation and cause stickiness or responsiveness issues. To keep them clean, you should regularly inspect these areas for debris. Here are some tips to maintain them: – Use a soft brush or toothbrush to loosen dirt – Dampen a cloth with isopropyl alcohol for quick wiping – Avoid excessive moisture that could damage internal components – Focus on the edges and crevices of the buttons – Consider using compressed air to blow out hidden particles. Regular cleaning prevents grime buildup, ensuring your controller remains responsive and comfortable to use. Staying proactive helps avoid sticky buttons and prolongs your device’s lifespan. Proper maintenance also involves understanding common buildup zones, which can vary based on usage, including areas prone to sweat and oil accumulation, as well as other high-friction contact points that experience frequent handling. Additionally, recognizing environmental factors such as humidity and dust can further aid in maintaining a clean and functional controller.
Joystick Bases and Their Maintenance

To keep your joystick bases working smoothly, you should regularly remove dust and debris that can cause sticking or uneven movement. Use isopropyl alcohol to clean the contact points and make sure they stay free of grime. Don’t forget to lubricate the moving parts to maintain responsiveness and extend the lifespan of your controller.
Remove Dust and Debris
Have you noticed dust and debris accumulating around the bases of your joystick? It’s common and can affect performance over time. To keep your controller in top shape, remove this buildup regularly. Use a small, soft brush or compressed air to dislodge particles hiding in crevices. Gently wipe the area with a microfiber cloth to pick up lingering dust. Pay attention to the tight spots where dirt tends to settle. Avoid using water or harsh chemicals that could damage electronics. Regular cleaning not only maintains responsiveness but also prolongs your controller’s lifespan. Remember, keeping these areas clean prevents grime from working its way into internal components. Consistent maintenance ensures your gaming experience remains smooth and enjoyable.
Clean With Isopropyl Alcohol
Using isopropyl alcohol is an effective way to thoroughly clean the bases of your joysticks. Dampen a soft cloth or cotton swab with a small amount of 70% or higher concentration alcohol. Gently wipe around the base, focusing on areas where grime and oils tend to accumulate. The alcohol dissolves dirt, grease, and bacteria, leaving the surface clean and sanitized. Be careful not to oversaturate, especially around the electronic components. Avoid pouring alcohol directly onto the controller; instead, apply it to your cleaning tool. After cleaning, give the area a few moments to dry completely before using the joystick again. This process helps maintain smooth movement and prevents buildup that can hinder responsiveness over time.
Lubricate Moving Parts
Lubricating the moving parts of your controller helps guarantee smooth joystick operation and reduces wear over time. Proper lubrication ensures your joystick responds accurately and feels effortless during gameplay. Use a small amount of high-quality lubricant designed for electronics or plastics. Carefully apply it to the joystick base and pivot points, avoiding excess that could attract dirt. Regular lubrication prevents stiffness, squeaks, and potential damage from friction. Keep in mind these tips:
- Use a precision applicator for controlled application
- Avoid over-lubricating, which can attract debris
- Clean old lubricant before applying new
- Focus on pivot points and contact areas
- Test joystick movement after lubrication to ensure smoothness
The Back and Underneath the Controller
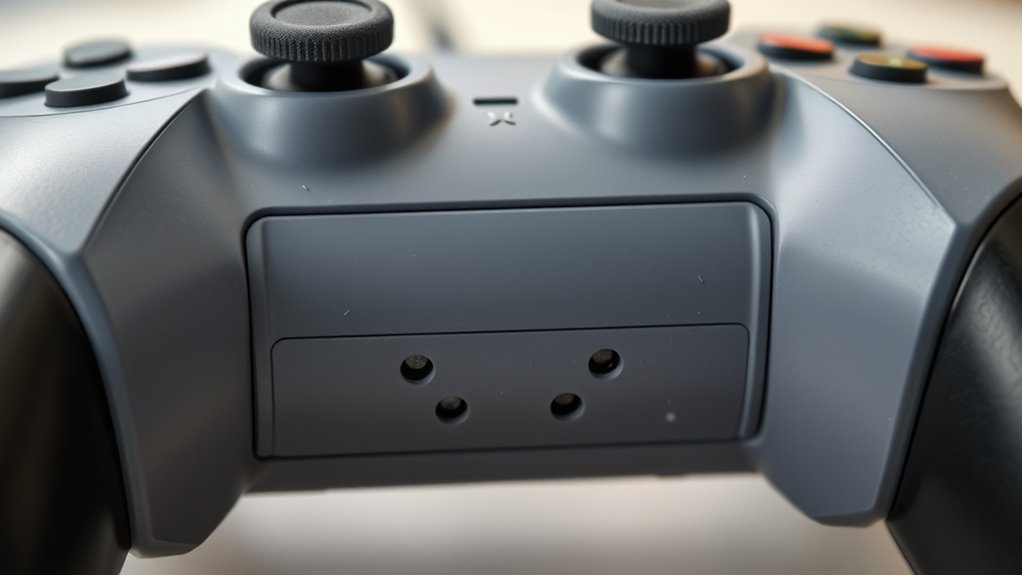
Ever wonder what’s hiding behind and underneath your controller? Dust, dirt, and sweat tend to settle in those hidden spots, especially around the seams and crevices. To clean this area, turn your controller upside down and gently shake it to dislodge loose debris. Use a soft brush or compressed air to reach into tight corners and remove stubborn dirt. A slightly damp cloth or cleaning wipe can help wipe away grime on the exterior, but avoid excess moisture to prevent internal damage. Pay close attention to the back and underneath surfaces, where dirt accumulates unnoticed. Regular cleaning here not only keeps your controller looking good but also prolongs its lifespan and maintains peak performance. Just take your time, and don’t forget to dry thoroughly before use.
Charging Ports and Connection Points

Have you noticed that charging ports and connection points can accumulate dust, lint, and grime over time? These hidden spots can hinder your controller’s performance and make charging or connecting frustrating. To keep things working smoothly, regularly inspect and clean these areas. Use a soft brush or compressed air to gently remove debris from inside ports. Avoid using liquids that could damage sensitive electronics. Make sure your connection points are dry before plugging in cables again. Cleaning these spots prevents build-up that can cause poor connections or static. Remember, maintaining clean ports ensures reliable charging and seamless gameplay.
Regularly clean ports with a soft brush or compressed air to ensure reliable connections and optimal performance.
- Remove dust with a soft brush or compressed air
- Don’t insert objects that could damage contacts
- Keep ports dry and free from moisture
- Check for corrosion or debris buildup
- Clean regularly for ideal performance
Surface Materials and Cleaning Compatibility

Cleaning your controller’s surface materials requires choosing the right methods to avoid damage. Different materials, like plastic, rubber, or textured grips, react differently to cleaning products. For smooth plastic surfaces, a soft microfiber cloth dampened with a mild cleaning solution works well. Avoid harsh chemicals or abrasive scrubbers that could scratch or discolor the surface. Rubber and textured areas may trap dirt and grime, so gentle brushing with a soft brush helps loosen debris without harming the material. Never submerge the controller or use excessive moisture, especially on sensitive parts. Always test a small area first to ascertain compatibility. By understanding your controller’s materials, you can select cleaning techniques that keep it spotless without risking damage or wear.
Tips for Regular Maintenance and Prevention
Regular maintenance is essential to keep your controller functioning smoothly and looking its best. By taking proactive steps, you prevent grime buildup and extend its lifespan. Establish a routine cleaning schedule, ideally once a month, to catch dirt early. Always store your controller in a clean, dry place away from direct sunlight and moisture. Avoid eating or drinking near your device to minimize spills and crumbs. Use gentle cleaning tools like microfiber cloths and avoid harsh chemicals that could damage surfaces. Additionally, inspect buttons and triggers regularly for dust or debris and clean them gently. These simple habits help maintain ideal performance and keep your controller in top shape longer.
- Clean buttons and triggers weekly with a soft brush
- Keep hands clean before gaming sessions
- Use a protective case when not in use
- Avoid exposing your controller to extreme temperatures
- Regularly check for signs of wear or damage
Frequently Asked Questions
How Often Should I Deep Clean My Controller?
You should deep clean your controller every 1 to 2 months, depending on usage. Regular cleaning prevents grime buildup and maintains peak performance. If you notice dirt, sticky buttons, or reduced responsiveness, it’s time for a thorough clean. Use a soft cloth, isopropyl alcohol, and a small brush to reach crevices. Consistent deep cleaning keeps your controller in top condition and prolongs its lifespan.
Are There Any Cleaning Methods to Avoid?
You should avoid using harsh chemicals like bleach, alcohol, or abrasive cleaners on your controller, as they can damage the surface or remove labels. Don’t submerge your controller in water or use excessive moisture, which can harm internal components. Avoid scrubbing with rough materials that might scratch. Instead, opt for gentle wipes or a slightly damp cloth with mild soap, ensuring you don’t leave excess moisture behind.
Can Cleaning Damage Sensitive Controller Electronics?
Cleaning sensitive controller electronics can cause damage if you’re not careful. You should avoid using excessive liquid or harsh cleaners that might seep into the device and cause short circuits. Instead, use a soft, slightly damp cloth and gentle cleaning solutions specifically designed for electronics. Always power off and unplug your controller before cleaning, and don’t use compressed air or abrasive tools, as they can harm delicate components.
What Tools Are Best for Detailed Cleaning?
Think of your controller as a delicate garden needing gentle care. Use soft brushes, cotton swabs, and microfiber cloths for detailed cleaning—these tools are like tender hands that remove dirt without harming fragile leaves. Isopropyl alcohol (at least 70%) can help disinfect, but avoid soaking. With patience and the right tools, you’ll restore your controller’s shine and function, preserving its lifespan like nurturing a precious bloom.
How Do I Sanitize My Controller Safely?
You can sanitize your controller safely by disconnecting it first. Dampen a microfiber cloth with a mixture of 70% isopropyl alcohol and water, then gently wipe all surfaces, avoiding excess moisture. Use cotton swabs dipped in the solution to reach tight spots. Let the controller air dry completely before reconnecting or using it. This method effectively kills germs without damaging your controller’s electronics.
Conclusion
So, after all that scrubbing, you’d think your controller’s finally spotless, right? But surprise—those sneaky crevices and hidden bores probably still hide some grime. Ironically, the more you clean, the more you realize how much you missed. Keep up with regular maintenance, and maybe, just maybe, your controller will stay pristine enough to avoid that dreaded “sticky button” surprise during your next gaming marathon. Happy cleaning—and game on!