
Set up your VR gaming headset, adjust it for a clear and comfortable view, and launch your first game. This guide is for beginners using a standalone headset or one connected to a PC or console. Allow 30-60 minutes for setup and a first play session; exact menus and requirements vary by headset model.

Play games on Amazon Luna for your next adventure, included with Prime
- A rotating selection of games, no download needed
- Play on TV, laptop or phone
- Fast, free delivery for your gear, too

Meta Quest 3 512GB VR Headset – Golf+ Included – Tee Off in VR
- ✔ Storage: 512 GB
- ✔ RAM: 8 GB
- ✔ Processor: Snapdragon XR2 Gen 2

Meta Quest 3S 128GB VR Headset – Golf+ Included
- ✔ Storage: 128 GB
- ✔ RAM: 8 GB
- ✔ Processor: Snapdragon XR2 Gen 2

Meta Quest 3S 128GB VR Headset (Renewed)
- ✔ Storage: 128 GB
- ✔ RAM: 8 GB
- ✔ Processor: Snapdragon XR2 Gen 2
Difficulty: Beginner | Time: 30-60 minutes
What You’ll Need
Tools & Materials:
- VR headset and its controllers
- Compatible smartphone, PC, or console if your headset requires one
- Wi-Fi access for setup, updates, or game downloads
- A clear play area with enough room to move safely
- Charging cable or charged batteries
Knowledge:
- Basic ability to use the headset’s menus and its companion app
- Your headset’s model and compatible platform
Check the manufacturer’s setup guide for model-specific requirements, age guidance, supported games, and connection instructions. Charge the headset and controllers before starting. If the headset is shared, plan to adjust its fit and lens spacing for each player.
Meta Quest 3 512GB VR Headset – Golf+ Included – Tee Off in VR
The Meta Quest 3 512GB is the most complete gaming choice here for players who want a standalone headset and enough capacity to keep a broad library installed. Its stated 2064 × 2208 pixels per eye and 120 Hz refresh rate lead the new-product listings in this group. Those figures matter most in games with quick movement or detailed environments, where a clearer, smoother image can support immersion. The 8GB RAM and Snapdragon XR2 Gen 2 platform also match the new Quest 3S, so the case for choosing Quest 3 rests on its display and storage advantages rather than a different processor class.Compared with the 128GB Quest 3S, the 512GB model leaves considerably more room for games and downloaded content before you have to manage what stays installed. That convenience comes with an important limitation: storage is fixed and cannot be expanded. Its listed battery life is about 2.2 hours, which is slightly shorter than the 3S listings claim, so marathon sessions still call for charging breaks or an external power plan. We would choose it for the strongest overall mix in this lineup, while players who have a small library and want a simpler entry point can save space and complexity with the Quest 3S instead.
Pros:
- 512GB storage accommodates a larger installed game library than either 128GB Quest 3S.
- Highest stated per-eye resolution among the supplied new-headset listings.
- 120 Hz refresh rate is the fastest listed in this comparison.
- Wireless standalone play and dual RGB passthrough support VR and mixed-reality use.
Cons:
- About 2.2 hours of stated battery life can constrain longer play sessions.
- Storage is fixed with no expansion option.
- The larger capacity may be unnecessary for players who keep only a few games installed.
Best for: Players who want a standalone headset with the lineup’s largest built-in game storage and strongest stated display specifications.
Not ideal for: Players prioritizing longer uninterrupted sessions, expandable storage, or a more basic headset for occasional play.
Bottom line: We rank Quest 3 first for its combination of the sharpest stated display, 120 Hz refresh rate and 512GB of onboard space, despite short battery life and fixed storage.
“We rank Quest 3 first for its combination of the sharpest stated display, 120 Hz refresh rate and 512GB of onboard space, despite short battery life and fixed storage.”
Meta Quest 3S 128GB VR Headset – Golf+ Included
The new Meta Quest 3S 128GB keeps the same Snapdragon XR2 Gen 2 processor and 8GB RAM listed for Quest 3, making it a credible way into standalone gaming without stepping up to the 512GB model. It is wireless, includes motion-sensing controllers and has dual RGB passthrough cameras, so the core play setup does not depend on a PC or a tether. Its 128GB capacity suits someone who rotates through a handful of games rather than keeping a large collection ready at all times.The compromises become clearer beside Quest 3: this listing gives the 3S a 1832 × 1920 per-eye display and 60 Hz refresh rate, below Quest 3’s stated 2064 × 2208 and 120 Hz. For slower games, that may be a reasonable exchange; for fast action or players especially sensitive to visual smoothness, the more capable display figures on Quest 3 make it the better fit. The 3S also lists a 2.5-hour average battery life and weighs 515g, so it does not solve the session-length or comfort limits. We see it as the practical new-buyer pick when storage needs are modest and the lower display specifications are acceptable.
Pros:
- Standalone wireless design needs no PC for supported headset games.
- XR2 Gen 2 processor and 8GB RAM match the listed Quest 3 platform memory.
- Dual RGB passthrough cameras support mixed-reality experiences.
- 128GB storage is suitable for a rotating collection of games.
Cons:
- Listed 60 Hz refresh rate and 1832 × 1920 per-eye resolution trail Quest 3.
- About 2.5 hours of stated battery life limits extended sessions.
- At 515g, the headset may become uncomfortable over long play periods.
Best for: First-time standalone VR players who want current-generation processing, wireless play and a modest game library.
Not ideal for: Players who want the sharpest image and fastest refresh rate in this group, or who install many large games at once.
Bottom line: We recommend the new Quest 3S for buyers entering standalone VR who can trade Quest 3’s stronger display and larger library capacity for a simpler 128GB setup.
“We recommend the new Quest 3S for buyers entering standalone VR who can trade Quest 3’s stronger display and larger library capacity for a simpler 128GB setup.”
Meta Quest 3S 128GB VR Headset (Renewed)
This renewed Quest 3S 128GB has the same broad appeal as the new 3S: standalone wireless play, an XR2 Gen 2 processor, 8GB RAM and enough stated capacity for a smaller rotation of games. Its supplied listing describes a 90 Hz refresh rate and roughly three hours of battery life, which would put it ahead of the new 3S listing on those two figures. It also gives a 2064 × 2208 display resolution, but does not clearly state that figure per eye. These details make it hard to compare directly with the new 3S, which lists 1832 × 1920 per eye at 60 Hz and about 2.5 hours.That inconsistency is the key buying consideration. Before choosing this renewed unit, we would confirm the precise model and included accessories, as well as what condition and coverage the seller provides. The provided description also says the standalone ecosystem restricts access to PC-VR titles; that limitation applies to the Quest platform approach, while the other two picks are standalone as well. Against Quest 3, this option still has half the storage and lacks the same clearly stated per-eye display detail, so it is not our all-around recommendation. It makes sense only for buyers comfortable with a renewed device and willing to resolve the listing ambiguity first.
Pros:
- Standalone wireless operation with the XR2 Gen 2 processor.
- 8GB RAM and 128GB storage match the new Quest 3S listing.
- Listing claims a 90 Hz refresh rate and approximately three-hour battery life.
- Dual RGB passthrough cameras are listed for mixed-reality use.
Cons:
- Display and battery specifications differ from the supplied new Quest 3S listing.
- Renewed condition makes unit condition and included accessories important to confirm.
- 128GB storage is substantially less than Quest 3’s 512GB.
Best for: Buyers open to a renewed standalone headset who want to compare the unit’s condition and included items before purchase.
Not ideal for: Anyone who wants unambiguous specifications, a new device, or the largest storage capacity for a long-term game library.
Bottom line: We place the renewed Quest 3S third because its claimed refresh and battery figures are promising, but the listing conflicts with the new 3S details and needs verification.
“We place the renewed Quest 3S third because its claimed refresh and battery figures are promising, but the listing conflicts with the new 3S details and needs verification.”
As an Amazon Associate we earn from qualifying purchases.
Before You Start
Choose a well-lit indoor space with a stable floor. Move furniture, pets, fragile objects, and trip hazards out of the play area. Keep the headset cable, if present, away from your feet and give yourself room to turn. Stop playing if you feel dizzy, nauseated, disoriented, or develop eye strain. Take breaks and follow the headset maker’s health and safety guidance.
Some headsets work on their own; others need a compatible computer or console. Confirm which kind you have before installing games. Do not force a connector or use an unapproved power adapter.
Step-by-Step Instructions
Step 1: Check the headset and charge its parts
Read the quick-start guide to identify whether your headset is standalone or needs a PC or console. Check that the headset, controllers, facial interface, and required cables are present. Charge the headset, fit fresh batteries if the controllers use them, and connect any required device using the maker’s instructions.
Tip: Use the included charger or a charger approved for your model. A low battery during setup can interrupt updates or pairing.
Check: The headset and controllers power on, and any required PC or console recognizes the headset.
Step 2: Install the companion app and update the headset
Install the official app from your device’s app store if your model requires a phone app. Sign in or create an account as prompted, then follow the pairing instructions shown in the app and headset. Connect to Wi-Fi and install available system updates before downloading games.
Tip: Keep the headset near the Wi-Fi router during large downloads. Menu names and account requirements differ by manufacturer.
Check: The app shows the headset as paired, and the headset reaches its home screen without an update prompt.
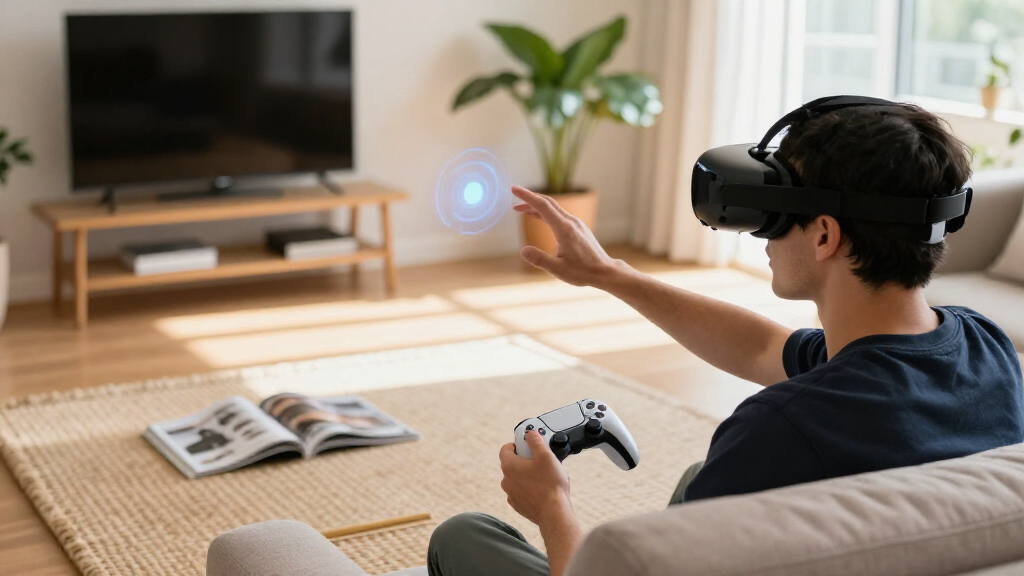
Step 3: Prepare a clear play area
Clear the floor and nearby surfaces of furniture, cables, and breakable items. Select a seated or standing setup in the headset’s boundary or play-area settings. Follow the prompts to mark the usable space, keeping a buffer between the boundary and walls or furniture. If using a wired headset, route the cable so it cannot wrap around your legs or snag on objects.
Tip: Start with a seated or stationary experience if you have limited room or are new to VR. Do not play near stairs, windows, or sharp corners.
Check: The headset displays the play boundary, and you can stand or sit and move within it without touching obstacles.
Step 4: Fit the headset and adjust the lenses
Loosen the head strap, place the facial interface evenly over your face, and tighten the strap until the headset feels secure without pressing painfully. Adjust the top strap if your model has one. Use the headset’s lens-spacing control, if available, to match the lenses to your eyes. Put on glasses only if the manufacturer says they fit safely; use any approved spacer or prescription lens insert as directed.
Tip: Do not force glasses against the headset lenses. Keep lenses clean with the cloth recommended by the maker, not household sprays or paper towels.
Check: The headset stays in place when you move your head, the image is reasonably sharp across the center, and there is no uncomfortable pressure.
Step 5: Pair and check the controllers
Pair each controller by following the on-screen prompts. Hold them as directed and use the wrist straps if supplied. Test the buttons, triggers, and pointing motion in the home environment. Keep your hands inside the marked play area while testing.
Tip: If tracking seems inconsistent, turn on room lights and move reflective or bright sunlight away from the tracking area, as directed in your headset guide.
Check: Both controllers appear in the headset and respond to pointing, button presses, and trigger presses.
Step 6: Choose and install a beginner-friendly game
Open the headset store or the platform’s game library and choose a title marked compatible with your headset. Check whether it supports seated play, room-scale movement, or a comfort mode. Start with a short experience and low-motion settings if available. Select install or purchase and wait for the download to finish.
Tip: Check the game’s movement style before launching. Smooth artificial movement can feel uncomfortable for some new players; teleport movement or stationary play may be easier to tolerate.
Check: The game appears as ready to launch in your library, with its compatibility and play requirements matching your setup.
Step 7: Launch the game and check comfort settings
Put on the headset and start the game from the library. Complete its calibration prompts while standing or sitting as selected. Open comfort or accessibility settings and choose a movement option that feels manageable. Begin with a short session, move slowly, and pause to remove the headset if you feel unwell.
Tip: Do not try to push through dizziness or nausea. End the session, rest, and return only when you feel well.
Check: The game responds to your controls, stays within the play boundary, and you can play briefly without discomfort.
Common Mistakes to Avoid
- Starting in a cluttered or undersized play area. — Clear the full movement zone, set the boundary with room to spare, and choose seated play when space is limited.
- Tightening the strap too much or leaving the lenses misaligned. — Adjust the strap gradually and use the lens-spacing control where available; stop if the fit causes pain or persistent blur.
- Launching a high-motion game for a long first session. — Choose a short, stationary or teleport-movement experience, enable comfort settings, and take a break at the first sign of discomfort.
- Pulling or stepping on the cable of a wired headset. — Route the cable behind you with slack, check it before play, and avoid turning in a way that wraps it around your body.
Troubleshooting
Problem: The headset will not pair with the companion app or controllers.
Solution: Check that Bluetooth is enabled on the phone if required, both devices have power, and you are following the pairing sequence for your model. Restart the headset and app, then try pairing again near the headset.
Problem: The image looks blurry or causes eye strain.
Solution: Reposition the headset, adjust the strap and lens spacing, and clean the lenses with the approved cloth. If blur continues, check whether your headset supports glasses or prescription inserts and follow its fit guidance.
Problem: Controllers disappear or tracking jumps.
Solution: Replace or recharge controller batteries, turn on even room lighting, and remove direct sunlight or reflective surfaces from the tracking area. Restart the headset if tracking does not recover.
Problem: A game will not install or launch.
Solution: Confirm that the game supports your headset and platform, check available storage and Wi-Fi, and install pending system updates. Restart the headset and retry the download.
What Success Looks Like
Your headset is updated and paired, the controllers respond, and the play boundary is visible and clear of obstacles. The headset fits securely with a clear central image. A compatible game launches and responds to your controls, and you can complete a short session without striking anything or feeling unwell.
Next Steps
After playing, exit the game, remove the headset, and store it in a clean, dry place away from direct sunlight; focused sunlight can damage headset displays. Recharge the headset and controllers as needed, and wipe the facial interface according to the maker’s cleaning instructions. For future sessions, recheck the boundary, cable route, and fit before starting. If discomfort persists across sessions or the headset appears damaged, stop using it and consult the manufacturer’s support guidance.
Frequently Asked Questions
Do all VR gaming headsets need a gaming PC?
No. Standalone headsets run games on the headset itself. Other models require a compatible PC or console. Check the model’s specifications and the game’s platform requirements before buying or installing.
How much space do I need to play?
Space needs depend on the game and whether you play seated, standing, or with room-scale movement. Follow the headset’s boundary prompts and the game’s stated requirements. If you cannot make a clear movement area, choose seated or stationary play.
Can I wear glasses under a VR headset?
That depends on the headset and your glasses. Check the manufacturer’s fit guidance and use an approved spacer or prescription lens insert if available. Do not press glasses against the headset lenses.
What should I do if VR makes me feel sick?
Pause the game and remove the headset. Rest until you feel normal, then shorten future sessions and try stationary or teleport movement with comfort settings. Stop playing if symptoms return or persist.
How do I clean a VR headset?
Follow the maker’s instructions for lenses, straps, and facial interface. Use only approved cleaning materials, and avoid sprays or liquids on the lenses unless the manual allows them. Let washable parts dry fully before reattaching.