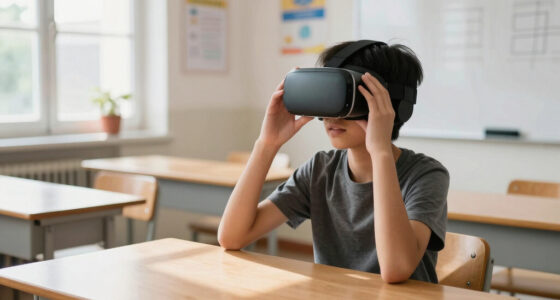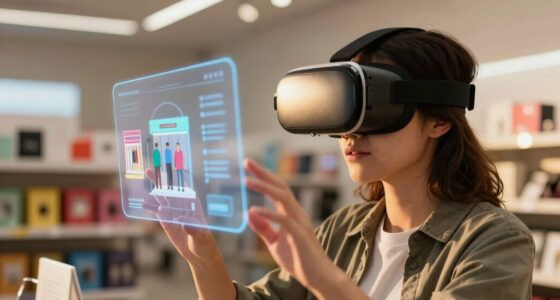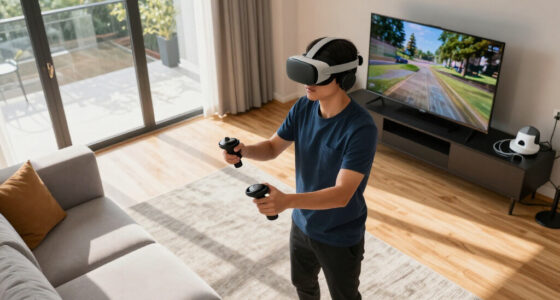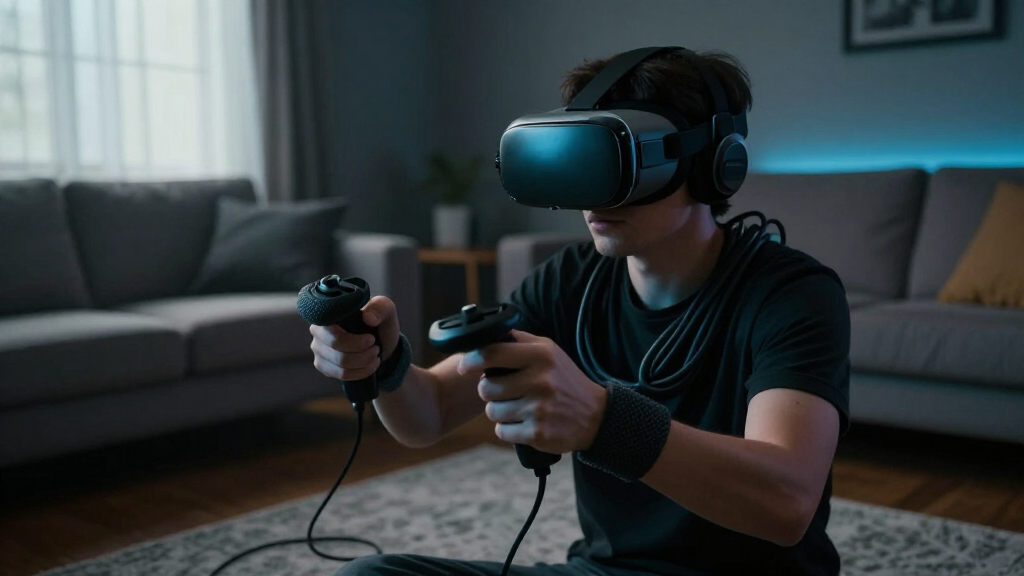

This guide helps you choose and set up VR horror game accessories for your headset and play space. It is for new or occasional VR players who want stronger audio, more comfortable controls, or optional haptic effects without creating safety or compatibility problems. Allow 30-60 minutes to check your equipment, arrange the room, install accessories, and test them in a short session.

Get VR and gaming gear delivered free — and shop member deals
- Fast, free delivery on millions of items
- Access to Prime Big Deal Days deals on October 6–7
- Prime Video, Amazon Music and more included
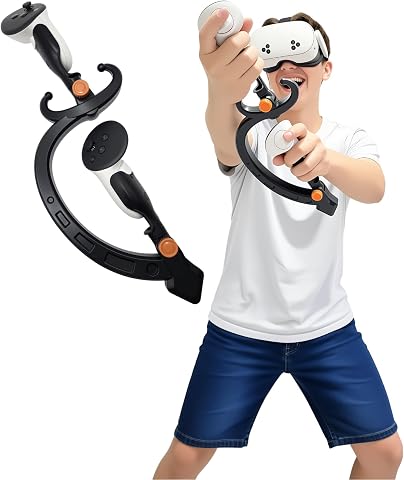
VR Two-Handed Sword for Meta Quest 2, Quest 3 & Quest 3S – Black
- ✔ Compatibility: Meta Quest 2, Quest 3, Quest 3S, Quest Pro
- ✔ Accessory type: Modular two-handed sword hilt
- ✔ Quick-release design: Half-shell

Apexinno VR Gun Stock Cover for Meta Quest 3 & Quest 3S Controllers
- ✔ Compatibility: Meta Quest 3 and Quest 3S
- ✔ Accessory type: VR gun stock cover
- ✔ Material: High-strength ABS

AMZDM Controller Grip for Meta Quest 3/3S VR Accessories – Silicone Grips with Non-Slip Thumbstick Covers, 1 Pair, Black
- ✔ Compatibility: Meta Quest 3 and Quest 3S
- ✔ Material: Silicone
- ✔ Package quantity: One pair
Difficulty: Beginner | Time: 30-60 minutes
What You’ll Need
Tools & Materials:
- VR headset and its standard controllers
- A VR-ready play space with clear floor area
- Compatible headphones or earbuds, if desired
- Compatible controller grips, wrist straps, or haptic accessories, if desired
- Headset and accessory charging cables or fresh batteries
Knowledge:
- Basic headset setup and controller pairing
- How to open the headset’s settings or companion app
- How to check a game’s supported devices and accessories
Check the headset model, controller version, game, and accessory specifications before buying or attaching anything. Accessories made for one headset may not fit another, and a game may not support a particular haptic device. Start with a clear play area and avoid wearing accessories that obstruct tracking, ventilation, or the headset’s safety features.
VR Two-Handed Sword for Meta Quest 2, Quest 3 & Quest 3S – Black
When a horror game asks us to swing, block, or change weapons quickly, a controller can feel more like a small remote than a sword. This modular hilt addresses that mismatch by adding weight and leverage, while its adjustable pivot lets us tailor the grip angle to different sword styles. Among these three accessories, it has the strongest direct connection to a specific horror-game action, making it our best overall choice for melee-focused play.The quick-release half-shell is its main practical distinction. It is designed to come off quickly, which can make switching between a two-handed setup, dual-wielding, or a shield arrangement less of a hassle. The fully modular, ambidextrous construction also offers more flexibility than the Apexinno gun cover, which is built around a shooting grip. Compatibility is wider too: this model lists Quest 2, Quest 3, Quest 3S, and Quest Pro, while the other two picks are limited to Quest 3 and 3S.That specialization still comes with a handling cost. Added leverage can make swings feel more substantial, but it also means we are carrying a larger attachment instead of holding a bare controller. Players who depend on small, precise motions—or frequently switch between unrelated game types—may prefer the simpler AMZDM grips. This hilt is limited to Meta Quest controllers, and its Wi-Fi listing does not make it a general-purpose accessory for other headsets. We would choose it for melee immersion, not as a universal controller upgrade.
Pros:
- Adds weight and leverage for a more substantial sword-game grip.
- Adjustable pivot supports different grip angles and sword styles.
- Quick-release half-shell supports faster changes to dual-wielding or shield setups.
- Modular ambidextrous design works for left- or right-handed use and can work with existing silicone grips.
Cons:
- Compatible only with Meta Quest controllers, not other VR systems.
- The added size and leverage may feel cumbersome for precise or non-melee play.
- A specialized hilt is less useful for players who rarely use virtual swords.
Best for: Quest players who mainly use swords or similar melee weapons in VR horror and want adjustable, more substantial controller handling.
Not ideal for: Players on non-Quest headsets, those who prefer bare controllers for precise movements, or horror players focused mostly on firearms and exploration.
Bottom line: For Quest owners whose horror sessions center on melee combat, this is the most adaptable and gameplay-specific accessory in the group, provided they accept its extra bulk.
“For Quest owners whose horror sessions center on melee combat, this is the most adaptable and gameplay-specific accessory in the group, provided they accept its extra bulk.”
Apexinno VR Gun Stock Cover for Meta Quest 3 & Quest 3S Controllers
For horror games built around firearms, steadier controller positioning can matter more than extra weapon-like heft. The Apexinno cover is aimed at that need: its textured ABS grip adds weight and balance, while precision cutouts are designed to avoid tracking interference. Compared with the sword hilt, it is the clearer choice for aiming-focused play; compared with the AMZDM grips, it makes a more specialized change to how we hold the controllers.Installation is straightforward by design: the cover snaps into place without tools. That is useful if we want to fit an accessory for a shooting session without turning setup into another task. Its ergonomic, anti-slip surface may also help maintain a consistent hold during tense encounters. The listed compatibility is specifically Quest 3 and Quest 3S, however, so owners of Quest 2 or Quest Pro should not assume it will fit simply because the sword hilt covers those headsets.There is a real compromise between a more anchored grip and a light, familiar controller feel. The description notes that the cover can add bulk, which may be unwelcome when a game asks us to reload, interact with objects, or make quick fine movements. It also does not offer the sword’s adjustable pivot or rapid configuration changes for different weapon styles. For shooting-heavy horror on a supported headset, that narrow purpose is a strength; for mixed play or broader compatibility, the sword or AMZDM grips make more sense.
Pros:
- Adds weight and balance for a more stable-feeling shooting grip.
- Textured ABS surface is designed to reduce slipping.
- Precision cutouts are intended to preserve controller tracking.
- Snap-in, tool-free installation makes it easy to fit or remove.
Cons:
- Compatibility is limited to Quest 3 and Quest 3S.
- Added bulk may make quick interactions or fine controller movements less comfortable.
- Its shooting-specific shape is less versatile than general protective grips.
Best for: Quest 3 and Quest 3S owners who play shooting-focused VR horror and want a textured, weighted grip intended to help stabilize aim.
Not ideal for: Quest 2 or Quest Pro owners, players who dislike bulk, or anyone looking for a flexible accessory for melee and general controller use.
Bottom line: This is the most targeted choice for shooting-heavy horror on Quest 3 or 3S, but its narrow compatibility and extra bulk make it less adaptable than the sword or silicone grips.
“This is the most targeted choice for shooting-heavy horror on Quest 3 or 3S, but its narrow compatibility and extra bulk make it less adaptable than the sword or silicone grips.”
AMZDM Controller Grip for Meta Quest 3/3S VR Accessories – Silicone Grips with Non-Slip Thumbstick Covers, 1 Pair, Black
Not every horror accessory needs to imitate a weapon. The AMZDM pair focuses on the basics that affect a long session: a non-slip silicone surface, controller coverage, and elastic knuckle straps intended to reduce the chance of losing our grip. It is the most general-purpose option here. Compared with the Apexinno cover, it is less about stabilizing aim; compared with the sword hilt, it changes the controller feel less dramatically and is not tied to melee combat.The practical case is comfort and upkeep. The silicone is described as waterproof and easy to clean with water or a damp cloth, and the grips are intended to help protect controllers from sweat, dust, and scratches. Adjustable vegan leather elastic straps are meant to suit most hand sizes, offering another way to keep the controller secure when a game gets intense. For players who use several types of VR horror games, these everyday benefits may be more valuable than an accessory that only supports one weapon style.But a protective layer is not automatically a better fit for everyone. The grips add bulk, which may make precise handling feel less natural, and the product supplies one size rather than a range. Its Quest 3 and Quest 3S-only compatibility is also narrower than the sword’s. We would pick the AMZDM pair when grip security, cleaning, and controller protection come first. If we want a noticeable change to sword leverage or shooting stability, the two weapon-focused accessories are more appropriate.
Pros:
- Silicone covers help protect against sweat, dust, and scratches.
- Non-slip surface and elastic knuckle straps support a more secure hold.
- Easy-to-clean material suits repeated long sessions.
- Pair format covers both controllers for general-purpose use.
Cons:
- Added bulk may affect precise controller handling.
- Only one size is supplied, which may not suit very small or large hands.
- Limited to Quest 3 and Quest 3S controllers.
Best for: Quest 3 and Quest 3S players who want easy-to-clean controller protection, a non-slip hold, and knuckle straps for longer sessions across different games.
Not ideal for: Players who want weapon-specific handling, use Quest 2 or Quest Pro, or need a precise fit beyond the single supplied size.
Bottom line: Choose these grips for practical comfort and controller protection across different horror games, not for the weapon-like leverage or aim support offered by the other picks.
“Choose these grips for practical comfort and controller protection across different horror games, not for the weapon-like leverage or aim support offered by the other picks.”
As an Amazon Associate we earn from qualifying purchases.
Before You Start
Choose the specific problem you want an accessory to solve. Use headphones for more detailed sound, controller grips for comfort or retention, or a compatible haptic device for physical feedback. Treat accessories as optional; adding equipment does not automatically make a game more comfortable or immersive.
Read the manufacturer’s fitting, cleaning, charging, and safety instructions before setting up. Do not modify the headset, block its cameras or sensors, cover ventilation openings, or attach loose objects that could fall during play. If you are prone to motion sickness, plan a short first session and enable the game’s comfort settings. Stop playing if you feel dizzy, nauseated, disoriented, or unwell.
Step-by-Step Instructions
Step 1: Choose one accessory to address a specific need
Identify the single improvement you want first: clearer game audio, a steadier controller grip, less discomfort, or physical feedback. For audio, compare wired and wireless headphones with your headset’s ports and supported Bluetooth features. For grips or straps, confirm that they are made for your exact controllers and leave buttons, tracking rings, and battery doors accessible. For haptics, verify that both the accessory and the game support each other.
Review current product specifications and return terms before buying. Prioritize secure fit, easy removal, and compatibility over dramatic claims. Avoid accessories that require unapproved headset modifications or block the headset’s view of the room.
Tip: Add accessories one at a time. If something feels uncomfortable or stops working, it will be easier to identify the cause.
Check: You can name the problem the accessory addresses and have confirmed its exact compatibility with your headset, controllers, and intended game.
Step 2: Prepare the room and check the equipment
Clear the play area of furniture, pets, cables, and objects you could strike or trip over. Set up the headset’s boundary or guardian system and check that its visible play area matches the actual open floor. Leave a safe margin from walls and fragile objects; do not rely on the virtual boundary to prevent every collision.
Inspect the headset, controller straps, accessory fasteners, and cables for damage. Charge the headset and rechargeable accessories, or install the correct batteries. Keep charging cables outside the play area and disconnect them before moving around unless the manufacturer specifically supports safe use while connected.
Tip: If you use a cable-connected accessory, route the cable so it cannot wrap around your legs, neck, or controller. Wireless equipment still needs a clear, safe play space.
Check: The room is clear, the boundary is set, equipment is undamaged and powered, and no cable crosses the area where you will move.
Step 3: Fit the accessory without blocking the headset
Turn off the headset and follow the accessory’s fitting instructions. Attach controller grips or straps so each controller sits securely in your hand and every button, trigger, tracking surface, and battery compartment remains accessible. Adjust wrist straps so they stay on without tightening enough to restrict circulation.
Connect headphones to the supported port or pair them through the headset’s settings. Position ear cups or earbuds so they do not push the headset out of place or cause pain. Keep the headset cameras, sensors, vents, face interface, and adjustment controls unobstructed. Remove anything that interferes with tracking or prevents you from taking the headset off quickly.
Tip: Do not force an accessory onto a controller or headset. A tight fit can damage plastic parts, buttons, or straps.
Check: The accessory is secure, comfortable at rest, and does not block controls, sensors, ventilation, or removal of the headset.
Step 4: Pair and configure supported devices
Turn on the headset and open its device settings or companion app. Put wireless headphones or haptic accessories into pairing mode and follow the manufacturer’s pairing process; grant only the permissions the device needs. For a wired accessory, seat the connector and check that the headset recognizes it.
Open the game’s settings and review its audio, comfort, controller, and haptic options. Select the accessory or enable its supported feature if the game requires a separate setting. Set volume and haptic intensity to moderate levels; loud audio and strong vibration can be uncomfortable and may hide real-world sounds. Confirm game support rather than assuming that a paired device will work.
Tip: If pairing fails, check the accessory’s charge, pairing mode, compatibility list, and any required firmware or app instructions before repeating the pairing process.
Check: The headset or game shows the accessory as connected or active, and its relevant settings are available.
Step 5: Test fit, controls, audio, and tracking
Put on the headset and adjust it according to its fitting instructions. Check that the image is clear, the headset stays in place when you move your head gently, and the accessory does not press painfully against your face or ears. Test the controller buttons and triggers in the headset menu before launching the game.
Start a short, low-intensity session in which you can safely stand or sit. Confirm that game audio reaches both ears at a comfortable level, the controllers track correctly, and any supported haptic effect occurs at an acceptable strength. Stop and fix the cause if a strap slips, a cable pulls, tracking drops, or discomfort appears. Take off the headset before adjusting an accessory near your eyes or face.
Tip: Keep the first test brief. A horror game can make sudden sounds or movements feel more intense, so test comfort in a calm area first when possible.
Check: You can see clearly, reach every needed control, hear at a comfortable level, and move without accessory slippage, tracking problems, or pain.
Step 6: Start the game and monitor comfort
Launch the game after the short test passes. Keep the play area boundary visible where the headset allows it, and use the game’s comfort options if you need snap turning, reduced movement, or seated play. Maintain the volume and haptic levels that felt comfortable during testing.
Pause and remove the headset if you feel unwell, become disoriented, or notice that an accessory has shifted. After playing, power down accessories as directed, disconnect them without pulling on cables, and inspect straps and connectors for wear. Clean shared contact surfaces with a method approved by the headset and accessory manufacturers.
Tip: Do not keep playing through pain, nausea, or dizziness. A shorter session is safer than trying to adapt while uncomfortable.
Check: The game runs with the accessory functioning as intended, and you can stop or remove the headset promptly if discomfort or a problem occurs.
Common Mistakes to Avoid
- Buying an accessory that fits a different headset or controller generation. — Match the exact headset and controller model against the accessory maker’s compatibility list before ordering.
- Assuming a connected haptic device works in every horror game. — Check the game’s supported-device list and settings; verify support before relying on the accessory.
- Over-tightening a strap or using audio and vibration at excessive levels. — Follow fitting instructions and begin at moderate settings. Stop if you feel pressure, pain, ringing, or discomfort.
- Testing accessories in a cluttered room or leaving cables across the play space. — Clear the floor, reset the boundary, and route or disconnect cables before standing or moving.
Troubleshooting
Problem: A wireless accessory does not pair or disconnects repeatedly.
Solution: Charge it, confirm it is in pairing mode, and check the headset’s supported connection type. Remove an old pairing entry and pair again using the manufacturer’s instructions. Check for required software updates; do not assume every Bluetooth audio device is supported.
Problem: The controller grip slips, blocks a button, or interferes with tracking.
Solution: Pause and remove the headset before adjusting it. Refit the accessory according to its instructions, check that it matches the controller model, and remove it if it still blocks controls or tracking.
Problem: Game audio is quiet, distorted, or playing through the wrong output.
Solution: Check the headset’s selected audio output, the game’s volume setting, and the headphone connection. Reduce volume before testing again. If the game does not support the chosen wireless device, use a supported output instead.
Problem: Haptic feedback does not activate during play.
Solution: Confirm that the accessory is powered and paired, then check the game’s accessory and haptic settings. Verify that the specific game supports the device. If support is absent, use the game without that accessory rather than installing unapproved modifications.
What Success Looks Like
The setup is ready when each accessory is confirmed compatible, attached securely, and recognized by the headset or supported game. The boundary matches a clear play area; controls, tracking, ventilation, and headset removal remain unobstructed; and a short test confirms comfortable fit, usable audio, and any supported haptic response. You should be able to stop play and remove the headset promptly without tripping over cables or struggling with the accessory.
Next Steps
After each session, power down and store accessories as their makers direct. Clean face-contact surfaces with approved materials, keep connectors and batteries dry, and check straps, cables, and fasteners for wear before the next use. If you add another accessory, repeat the compatibility and short-test process rather than changing several parts at once. Contact the accessory or headset manufacturer if a compatible device continues to fail, becomes damaged, or causes persistent discomfort.
Frequently Asked Questions
Do I need accessories to play a VR horror game?
No. The headset and its standard controllers are enough for most games. Headphones, grips, or haptics are optional additions; choose them only if they address a specific need and are supported by your equipment.
Are regular Bluetooth headphones compatible with every VR headset?
No. Headsets vary in Bluetooth audio support, connection options, and latency. Check your headset’s specifications and the headphone connection requirements. Use a supported wired or wireless option if the headset does not support your headphones.
Can I use a haptic vest or other wearable in any horror game?
No. The game must support the specific device or its software. Check the game and accessory compatibility information, then confirm that the relevant option appears in the game’s settings before playing.
What should I do if an accessory makes me uncomfortable?
Pause and take off the headset before adjusting anything near your face. Loosen or remove the accessory and check its fit instructions. Stop using it if pain, dizziness, skin irritation, or discomfort continues.
Fall Picks
fall essentials
As an affiliate, we earn on qualifying purchases.