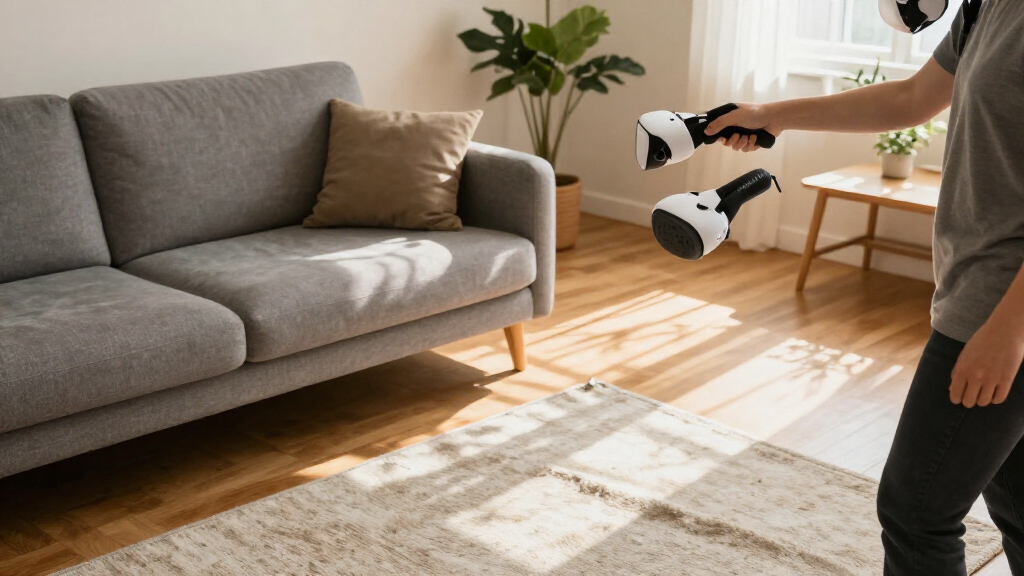

Set up a VR headset and motion controllers so you can enter a virtual environment, move safely, and interact with objects. This guide is for first-time users and assumes you have a compatible headset, controllers, and any required computer or console ready. Allow 30-60 minutes for charging, setup, fitting, and a first session.

Play games on Amazon Luna for your next adventure, included with Prime
- A rotating selection of games, no download needed
- Play on TV, laptop or phone
- Fast, free delivery for your gear, too

Meta Quest 3 512GB VR Headset with GOLF+
- ✔ Platform: Standalone; Meta Horizon OS
- ✔ Resolution: 2064 × 2208 pixels per eye
- ✔ Refresh rate: Up to 120 Hz

Sony PlayStation VR Marvel’s Iron Man VR Bundle (PS4/PS5 Compatible)
- ✔ Platform: PlayStation 4 and PlayStation 5
- ✔ Display: OLED
- ✔ Resolution: 1920 × 1080 pixels

PlayStation VR Marvel’s Iron Man VR Bundle with Headset, Camera, Move Controllers, and Charging Dock
- ✔ Platform: PlayStation 4
- ✔ Display: 5.7-inch OLED
- ✔ Maximum resolution: 1920 × 1080 pixels
Difficulty: Beginner | Time: 30-60 minutes
What You’ll Need
Tools & Materials:
- VR headset and its compatible motion controllers
- Charging cable or charged batteries for the headset and controllers
- Compatible console, computer, or standalone headset account, if required
- A clear play area with enough room to extend your arms and take a step
- A stable chair for initial setup or breaks
Knowledge:
- Basic ability to follow the headset’s on-screen setup instructions
- Know how to connect your headset to its required console, computer, or Wi-Fi network
Check the headset maker’s setup instructions for model-specific requirements. Some headsets track movement with built-in cameras; others require external sensors or a computer connection. Charge devices before setup, and keep drinks, pets, children, and breakable objects outside the play area.
Meta Quest 3 512GB VR Headset with GOLF+
Quest 3 is the most flexible motion-controller option in this group because it runs without a PlayStation console, external camera, or tethering cable. That changes the practical experience: we can set it up in different rooms and use its color passthrough cameras to bring virtual elements into the physical space. The bundle also includes GOLF+ and in-game credits, giving it a clear activity focus alongside its broader standalone design.Its listed 2064 × 2208 resolution per eye and 120 Hz refresh rate are stronger display figures than either PlayStation bundle provides on paper. The PSVR Iron Man packages, however, come with two Move controllers and a camera, and they offer a console-based route for buyers who already own compatible PlayStation hardware. Quest 3 avoids that dependency, but its battery is stated at about 2.2 hours, and the supplied details require pairing with the Meta Horizon app for initial setup and game redemption. Choose it for freedom of placement and mixed reality; consider the PSVR kits if a ready-made PlayStation game bundle better fits your setup.
Pros:
- Standalone wireless design avoids a console, tracking camera, and tether cable.
- High listed per-eye resolution and 120 Hz refresh rate.
- Dual color cameras support mixed-reality passthrough.
- Includes GOLF+ and 1,800 in-game credits.
Cons:
- Stated battery life is approximately 2.2 hours per charge.
- Initial setup and game redemption require the Meta Horizon app.
Best for: Players who want a standalone wireless headset with motion controllers and mixed-reality passthrough.
Not ideal for: Buyers who need long sessions without recharging or want a bundle centered on PlayStation games.
Bottom line: We recommend Quest 3 for the broadest freedom of play, provided its battery runtime suits our session length.
“We recommend Quest 3 for the broadest freedom of play, provided its battery runtime suits our session length.”
Sony PlayStation VR Marvel’s Iron Man VR Bundle (PS4/PS5 Compatible)
This Iron Man package is the clearest fit for PlayStation owners who want the headset, tracking camera, two Move controllers, and a featured game together. The motion controls are central to the included experience: players use them to handle Iron Man’s repulsor jets and combat, so the controllers are more than an accessory tucked into the box. Compared with the second PSVR bundle, this one lists a 90 Hz refresh rate and PS4/PS5 compatibility, making it the more attractive of the two on the provided specifications.That console fit comes with familiar PSVR limitations. The camera must be positioned for tracking, the system uses several cables, and motion-controlled play needs enough clear space. Quest 3 is simpler to place and does not rely on an external camera, while this package is better suited to players who already have a compatible PlayStation and want a packaged Iron Man experience. Its OLED display is listed at 1920 × 1080, which is well below Quest 3’s per-eye resolution figures. Buyers should also confirm which PS5 hardware and game compatibility conditions apply to their setup before committing.
Pros:
- Includes headset, camera, two Move controllers, and Iron Man VR.
- Motion controls are used directly for flight and combat in the included game.
- Lists compatibility with PlayStation 4 and PlayStation 5.
- OLED display and listed 90 Hz refresh rate.
Cons:
- Setup involves multiple cables and external camera placement.
- Motion-controlled play requires clear physical space.
- Resolution and platform flexibility trail the standalone Quest 3.
Best for: PS4 or PS5 owners seeking a PlayStation VR kit with camera, two Move controllers, and Iron Man VR.
Not ideal for: Buyers who prioritize untethered play, simple setup, or a broad standalone mixed-reality experience.
Bottom line: We would choose this as the PlayStation bundle when Iron Man VR and the listed 90 Hz specification matter more than wireless freedom.
“We would choose this as the PlayStation bundle when Iron Man VR and the listed 90 Hz specification matter more than wireless freedom.”
PlayStation VR Marvel’s Iron Man VR Bundle with Headset, Camera, Move Controllers, and Charging Dock
This bundle is the content-and-accessory alternative for buyers who want more than Iron Man VR in a PlayStation package. It adds Batman: Arkham VR, a demo code, and a fast-charging dock to the headset, camera, and two Move controllers. Compared with the B0B2WDLQQP kit, those extras make the package more varied on arrival, especially for someone who prefers several included experiences over the other bundle’s higher listed refresh rate and wider field of view.The tradeoffs are meaningful. This listing specifies PlayStation 4 compatibility, 60 Hz, and a 90-degree field of view, while the other PSVR bundle lists PS4/PS5 compatibility, 90 Hz, and 110 degrees. Both rely on camera tracking and a wired console setup, so neither matches Quest 3 for easy room-to-room use. The dock can help keep Move controllers ready between sessions, but it does not change the older headset’s tracking arrangement or platform limitation. We would pick this package when its extra content and charging accessory are the priority, after confirming that its listed games and compatibility suit our console.
Pros:
- Includes headset, camera, and two Move motion controllers.
- Adds Iron Man VR, Batman: Arkham VR, and demo content.
- Includes a fast-charging dock for the controllers.
- OLED display with listed 1920 × 1080 maximum resolution.
Cons:
- The supplied listing specifies PlayStation 4 compatibility.
- Listed refresh rate is 60 Hz and field of view is 90 degrees.
- Requires camera placement, cables, and space for motion play.
Best for: PS4 players who value multiple included VR experiences and a charging dock for Move controllers.
Not ideal for: PS5-focused buyers or anyone prioritizing the higher listed refresh rate and field of view of the other PSVR bundle.
Bottom line: We would choose this PSVR bundle for its extra included games and charging dock, while accepting its more limited listed specifications.
“We would choose this PSVR bundle for its extra included games and charging dock, while accepting its more limited listed specifications.”
As an Amazon Associate we earn from qualifying purchases.
Before You Start
Choose a well-lit room with a flat floor and enough open space to move without reaching a wall, desk, or ceiling fan. Remove rugs that can slide and anything you could trip over. If your headset uses external tracking sensors, install them as directed before drawing the boundary. Stop if you feel dizzy, nauseated, or disoriented; remove the headset and rest until you feel normal.
Step-by-Step Instructions
Step 1: Charge and inspect the equipment
Connect the headset to its charger and charge the controllers or insert fresh batteries. Check the lenses, straps, cables, and controller buttons for visible damage. Keep protective lens films on only until the manufacturer’s instructions say to remove them.
Tip:Do not use a damaged cable, swollen battery, or cracked controller. Use the supplied charger or a compatible charger specified by the manufacturer.
Check: The headset and controllers show adequate charge, and no parts or cables appear damaged.
Step 2: Prepare the room and connect the system
Clear the play area, then place the headset’s required console or computer nearby without stretching or crossing cables through your walking path. Turn on the headset and follow its prompts to connect to the required device, account, or network. Connect external tracking equipment if your model uses it.
Tip:For a wired headset, route the cable behind you and leave enough slack to turn. Do not tape a cable where it could pull on the headset or create a trip hazard.
Check: The headset reaches its home screen or setup screen without connection errors.
Step 3: Fit the headset
Loosen the head strap, place the facial interface evenly against your face, and tighten the strap until the headset stays in place without pressing painfully. Adjust the lens spacing or eye-position setting if your model provides one. If you wear glasses, follow the headset’s instructions for glasses clearance or use approved prescription inserts.
Tip:Do not force the headset against glasses or let lenses rub together; this can scratch either set of lenses. Keep the headset’s lenses out of direct sunlight.
Check: The view is reasonably sharp in the center, the headset does not slip when you gently move your head, and pressure feels comfortable.
Step 4: Turn on and pair the controllers
Use the controller power buttons or wake controls shown in the setup prompt. Follow the on-screen pairing instructions; depending on the model, pairing may happen automatically or require holding a button. Keep each controller within reach of the headset while pairing.
Tip:Remove any shipping tabs from battery compartments. If a controller does not appear, check its charge or batteries before repeating the pairing prompt.
Check: The setup screen shows both controllers, and their button or trigger presses produce a response.
Step 5: Set your floor level and play boundary
Stand in the cleared area and follow the prompts to set the floor height. Then trace the boundary around the space where you can move safely, keeping it well inside walls, furniture, and other hazards. Choose seated or stationary mode if you cannot make a clear walking area.
Tip:Do not draw the boundary through furniture or right up against a wall. Leave room to extend both arms and take a small step without contact.
Check: The virtual boundary appears in the correct place and height, and warnings show before you reach the real room’s edges.
Step 6: Check controller tracking and learn the controls
Hold both controllers where the headset can see them, then move each slowly through the space in front of you. Point, press the trigger, use the grip button, and test the menu or system button as instructed. Read the button prompts in the headset rather than guessing, because controls vary by app and model.
Tip:Avoid covering tracking cameras on the headset or controller. Very fast movements can make it harder to tell whether tracking is working correctly.
Check: The virtual hands or pointers follow your real movements, and the expected button prompts respond.
Step 7: Launch a beginner experience and take a short session
Select a beginner tutorial or comfortable stationary experience from the headset library. Start with the headset’s default comfort settings, such as teleport movement or snap turning when available. Play for a few minutes, pause, and remove the headset if you feel unwell.
Tip:Keep the wrist straps attached if supplied, and tighten them enough to retain the controllers without cutting off circulation. Never throw or swing a controller near another person.
Check: You can enter the experience, point and interact with an object, and return to the headset menu using the displayed controls.
Step 8: End the session and store the equipment
Use the in-headset menu or power instructions to exit the experience and shut down or sleep the headset. Wipe the facial interface with a material approved by the manufacturer, then store the headset and controllers in a cool, dry place away from sunlight.
Tip:Do not spray cleaner directly onto lenses or use household chemicals unless the manufacturer permits them.
Check: The session is closed, the lenses and sensors are unobstructed, and the equipment is stored safely.
Common Mistakes to Avoid
- Setting the boundary too close to walls or furniture. — Clear the area first and draw the boundary well inside all obstacles, with room to extend your arms and step.
- Wearing the headset loose or misaligned. — Adjust the strap and lens position until the central image is clear and the headset stays steady without painful pressure.
- Blocking the tracking cameras with hands, hair, or accessories. — Keep the headset cameras unobstructed and hold controllers where the headset can see them.
- Continuing to play through nausea or dizziness. — Stop promptly, remove the headset, and rest. Use shorter sessions and comfortable movement settings next time.
Troubleshooting
Problem: A controller will not pair or wake.
Solution: Check that it has charged batteries or adequate charge, remove any battery tab, and repeat the headset’s pairing instructions. Restart the controller or headset if the model’s instructions recommend it.
Problem: The controller pointer or virtual hand jumps or disappears.
Solution: Move to a well-lit area, uncover the headset’s tracking cameras, and keep controllers in the headset’s view. Clean cameras gently with a soft, dry cloth and retry tracking.
Problem: The image looks blurry or the headset keeps slipping.
Solution: Reposition the headset and tighten the strap evenly. Adjust lens spacing or eye position if available, then check that glasses are not touching the headset lenses.
Problem: The boundary is misplaced or appears at the wrong height.
Solution: Reopen the room or boundary setup, reset the floor level while standing on the actual floor, and redraw the play area from a safe position.
What Success Looks Like
Your headset reaches its home screen, both controllers pair and track your movements, and the floor level and boundary match the room. You can launch a beginner experience, perform a basic interaction, and exit safely. The headset fits comfortably and no real-world obstacle is inside the marked play area.
Next Steps
Begin with short sessions and take breaks between them. Recheck the boundary whenever you move the headset to another room or rearrange furniture. Charge the devices after use, clean the facial interface as directed, and consult the manufacturer’s support instructions if pairing or tracking problems continue.
Frequently Asked Questions
Can I use motion controllers while seated?
Many headsets and apps offer seated or stationary modes. Select one during setup or in the app settings, and keep enough clear space to move your arms without hitting nearby objects.
Do I need a computer or console?
It depends on the headset. Some models run apps on the headset itself, while others need a compatible computer or console. Check the model’s requirements before setup.
What should I do if I feel motion sickness?
Pause the experience, remove the headset, and rest. For a later session, try a shorter play period and choose stationary movement, teleport movement, or snap turning if the app provides those options.
How often should I reset the play boundary?
Reset it when you change rooms, move furniture, or notice that the displayed boundary no longer matches the clear space. Check it before room-scale play.