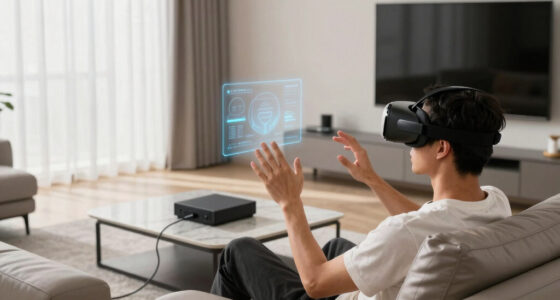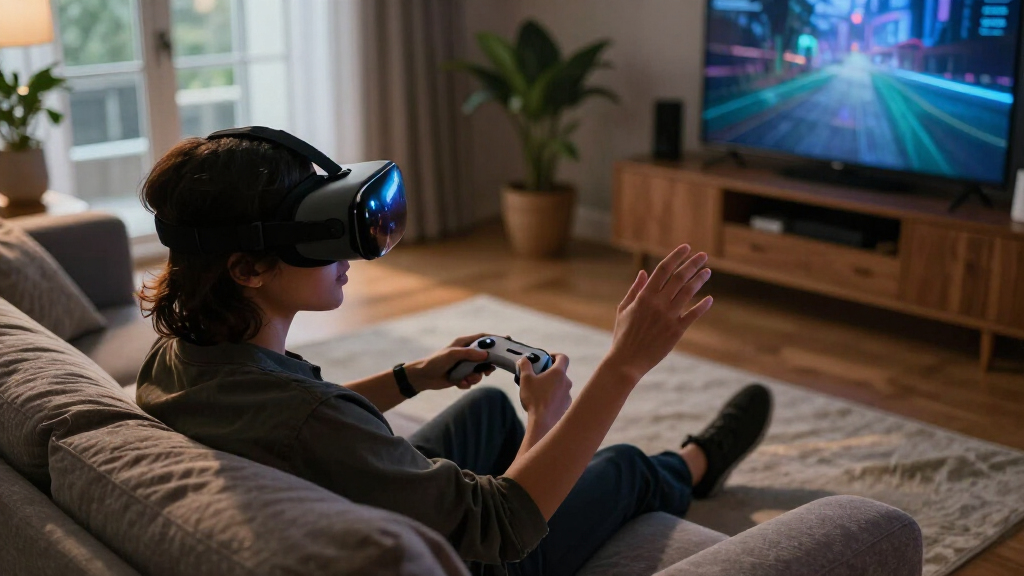

Set up a VR headset and start a game in a way that fits your computer or console, room, and comfort needs. This guide is for first-time VR players and anyone setting up a headset for a new gaming space. Allow 45-90 minutes for checking compatibility, installing software, adjusting the headset, and testing a game. You will finish with a working setup, a defined play area, and settings suited to your first session.

Get VR and gaming gear delivered free — and shop member deals
- Fast, free delivery on millions of items
- Access to Prime Big Deal Days deals on October 6–7
- Prime Video, Amazon Music and more included

Meta Quest 3 512GB VR Headset Gorilla Tag Bundle
- ✔ Storage: 512 GB
- ✔ RAM: 8 GB
- ✔ Processor: Snapdragon XR2 Gen 2

Oculus Rift S PC-Powered VR Gaming Headset
- ✔ Type: PC-powered VR headset
- ✔ Tracking: Oculus Insight inside-out tracking
- ✔ Controllers: Oculus Touch

Meta Quest 2 Advanced All-In-One VR Headset 128 GB
- ✔ Storage: 128 GB
- ✔ Play style: Standalone wireless
- ✔ Battery: Built-in rechargeable; runtime not specified
Difficulty: Beginner | Time: 45-90 minutes
What You’ll Need
Tools & Materials:
- VR headset with its required controllers and cables
- Compatible PC, console, or standalone headset, as required by the model
- Stable Wi-Fi connection for downloads and account setup
- Clear play area with enough room to move safely
- Charged controllers or suitable batteries
- Glasses spacer or prescription lens inserts, if needed
Knowledge:
- Basic ability to install apps, connect devices, and adjust system settings
- The headset model and whether it requires a PC or console
- Any platform account credentials needed to download games
Check the headset maker’s current compatibility requirements before buying or connecting it. PC headsets may require a suitable graphics card, USB port, and DisplayPort or USB-C connection; console headsets only work with supported console models. Clear floor space, secure pets and children outside the play area, and avoid playing near stairs, windows, or fragile objects. Stop if you feel nausea, dizziness, eye strain, or pain.
Meta Quest 3 512GB VR Headset Gorilla Tag Bundle
The Meta Quest 3 is the strongest all-around match for immersive gaming in this lineup because it pairs standalone play with the most advanced stated display and processor. Its 4K+ Infinite Display, described as a 30% resolution increase, is intended to make in-game scenes look more detailed, while the Snapdragon XR2 Gen 2 and 8 GB of RAM provide the processing platform for smooth standalone play. Compared with Quest 2, it offers four times the listed storage at 512 GB, which gives a larger library more breathing room. It also avoids the PC requirement that defines the Rift S.Wireless play is a meaningful advantage for games that invite movement, and dual RGB color passthrough cameras add a view of the surroundings when needed. The included Gorilla Tag bundle adds themed items, 2,000 shiny rocks, and a three-month game trial, making this package particularly relevant to players drawn to that title. The main compromise is endurance: the stated battery life is just over two hours, so longer sessions may require a break or charging plan. This is a better fit than Quest 2 for buyers who prioritize display capability and storage, but not for anyone who needs extended uninterrupted play.
Pros:
- 4K+ display is specified with a 30% resolution increase.
- Snapdragon XR2 Gen 2 processor and 8 GB of RAM support standalone gaming.
- 512 GB storage offers substantially more room than Quest 2’s 128 GB.
- Wireless play, color passthrough cameras, and Gorilla Tag bundle extras.
Cons:
- Battery life is specified at only just over two hours.
- The Gorilla Tag bundle adds less value for players uninterested in that game.
Best for: Wireless players who want the strongest stated display and processor in this comparison, plus generous room for installed games.
Not ideal for: Gamers who regularly play long sessions without breaks, or buyers who do not want the Gorilla Tag-focused bundle extras.
Bottom line: We rank Quest 3 first for its combination of wireless freedom, higher stated display capability, and the largest storage capacity here, with battery endurance as its clearest limitation.
“We rank Quest 3 first for its combination of wireless freedom, higher stated display capability, and the largest storage capacity here, with battery endurance as its clearest limitation.”
Oculus Rift S PC-Powered VR Gaming Headset
The Oculus Rift S takes a different route from both Quest headsets: it is PC-powered rather than standalone. That makes it a possible fit for players who already have a compatible computer and want to play through a PC-based VR setup, but it is the least convenient option for someone hoping to unpack a headset and play without another device. Its Oculus Insight inside-out tracking avoids the need for external sensors, which keeps room-scale setup simpler than a sensor-based arrangement. Updated Oculus Touch controllers are intended to support precise hand interaction.Its next-generation lenses are described as sharper and as reducing the screen-door effect, a benefit for players who want a clearer image than that artifact can provide. Still, the product details do not give a resolution figure that lets us directly compare it with Quest 3’s 4K+ display. Compared with Quest 3 and Quest 2, the Rift S also gives up wireless freedom and requires both a compatible PC and a Facebook account to log in. The adjustable halo headband addresses fit, but comfort will remain personal. We place it second because it can suit a PC-centered gaming setup well, yet its requirements make it a narrower recommendation than the standalone Quest models.
Pros:
- Inside-out Oculus Insight tracking does not require external sensors.
- Lenses are described as sharper with a reduced screen-door effect.
- Oculus Touch controllers support hand interaction.
- Adjustable halo headband allows fit adjustment.
Cons:
- Requires a compatible PC, unlike both Quest headsets.
- Requires a Facebook account to log in.
- Tethered PC-powered play is less flexible for movement than wireless Quest play.
Best for: Players with a compatible PC who want a PC-powered VR headset with inside-out tracking and Touch controllers.
Not ideal for: Buyers seeking wireless standalone gaming, people without a compatible PC, or anyone unwilling to meet the stated account requirement.
Bottom line: We recommend the Rift S only when a compatible PC is already part of the plan; otherwise, the standalone Quest models offer a simpler route into immersive gaming.
“We recommend the Rift S only when a compatible PC is already part of the plan; otherwise, the standalone Quest models offer a simpler route into immersive gaming.”
Meta Quest 2 Advanced All-In-One VR Headset 128 GB
The Meta Quest 2 is the entry point in this comparison for buyers who want a self-contained headset rather than a PC-dependent setup. It supports wireless standalone gaming, includes hand tracking and intuitive controllers, and adds 3D positional audio to help game sounds feel anchored around the player. Those capabilities make it a more flexible starting point than the Rift S for households without a gaming PC. Its stated library of more than 500 titles also signals a broad range of gaming and other VR experiences, though library size alone does not establish which individual games will suit a buyer.Compared with Quest 3, the tradeoff is less room for an installed collection: Quest 2 has 128 GB rather than 512 GB, and its description does not specify the same 4K+ display or newer processor. That makes it less attractive for players who want the strongest stated visual hardware or plan to keep many large games installed. Its built-in rechargeable battery supports portable play, but no runtime is provided, so we cannot judge how it compares with Quest 3’s stated two-plus hours. Content access also calls for attention in family settings: the supplied details note accounts for users aged 10 and warn that some apps are mature. We rank it third, not because it lacks standalone convenience, but because Quest 3 is the stronger fit for buyers focused on gaming capability and storage.
Pros:
- Standalone wireless play does not require a PC or console.
- Hand tracking and intuitive controllers support different ways to interact.
- 3D positional audio contributes to a more spatial game presentation.
- A stated library of more than 500 titles spans games and other experiences.
Cons:
- 128 GB storage is less than Quest 3’s 512 GB.
- Battery runtime is not specified in the supplied details.
- Some apps are mature, so account and content suitability need consideration.
Best for: New VR players seeking wireless, all-in-one gaming with hand tracking and positional audio, without needing a PC.
Not ideal for: Players who want the highest stated display capability, larger storage for a broad installed library, or clearly specified battery runtime.
Bottom line: Quest 2 is a practical standalone starting point, but we favor Quest 3 for buyers who want more storage and stronger stated display hardware.
“Quest 2 is a practical standalone starting point, but we favor Quest 3 for buyers who want more storage and stronger stated display hardware.”
As an Amazon Associate we earn from qualifying purchases.
Before You Start
Read the headset’s safety and setup instructions, especially for cable routing, lens care, and room-scale boundaries. Charge the headset and controllers before installing games. Do not expose lenses to direct sunlight: sunlight focused through the lenses can damage the display. If you use glasses, check the headset’s fit and the maker’s instructions before putting it on; do not force glasses against the lenses.
Step-by-Step Instructions
Step 1: Confirm the headset fits your gaming system
Check the headset model’s compatibility page and match it to your equipment. For a PC headset, compare your computer’s processor, graphics card, memory, ports, and operating system with the listed requirements. For a console headset, confirm that your console generation and required accessories are supported. For a standalone headset, check that it can run the games you want without a separate computer.
Choose a connection method before you begin. Wired connections can reduce wireless setup steps, while wireless PC streaming depends on a capable network and compatible software. Buy or download games only after checking that they support your headset and platform.
Tip: Minimum hardware may run a game but deliver lower visual quality or uneven performance. Compare recommended specifications when smooth gameplay matters.
Check: You can identify the required system, connection, software, and game platform for your headset.
Step 2: Prepare a safe play area
Choose a level, uncluttered area with enough space for the type of play you plan to do. Move furniture, cables, rugs that can slip, and breakable items out of reach. Keep the play area away from stairs, sharp corners, glass, heaters, and direct sunlight. If the game involves standing or turning, leave room to extend your arms without hitting walls or objects.
Use the headset’s seated mode for games that support it if your room is small. Tell other people not to enter the play area while you are wearing the headset, and keep pets away until you finish.
Tip: A headset can block your view of the real room. Do not rely on the boundary system to protect you from every hazard.
Check: You can stand or sit in your intended play position and move your arms without touching nearby objects.
Step 3: Install the required software and updates
Turn on the headset and follow its on-screen setup prompts, or install the manufacturer’s official app on your PC or console. Sign in to the required account, connect the headset as directed, and allow system software and controller firmware updates to finish. Keep the device powered and connected during updates; do not unplug it or close the update app unless it has stopped responding.
Install the platform’s game store or PC VR software only from the official source. If the headset needs a PC link app, install it before launching a game. Restart the computer or headset if the setup program requests it.
Tip: Updates can take several minutes and may require a restart. Avoid starting a game while an update is still in progress.
Check: The headset and controllers appear as connected in the official setup software, with no pending required update.
Step 4: Connect and position the headset
Connect the headset to its required power source and computer or console using the specified ports and cables. For a wireless setup, connect the headset and streaming device to the network and follow the manufacturer’s pairing steps. Place any external tracking cameras or base stations where the maker recommends, with an unobstructed view of the play area.
Put on the headset and adjust the head strap so the weight sits evenly rather than pressing hard on your face. Center the display over your eyes, adjust the lens spacing if the model allows it, and tighten the strap only enough to keep the image steady. Set interpupillary distance (IPD), if available, until text and edges look clear. Adjust the top strap or rear support to reduce pressure points.
Tip: Do not pull the headset tight to compensate for a blurry image. Reposition it and adjust lens spacing first; stop if the fit causes pain.
Check: The display stays centered when you turn your head, and the image looks clear without uncomfortable pressure.
Step 5: Set the boundary and tracking
Use the headset’s setup process to define your play boundary. Follow the prompts to mark the floor level and outline a safe area that does not extend through walls or furniture. Leave a buffer between the boundary and nearby hazards rather than drawing the line at the edge of your usable space. If you will play seated, set the correct seated or stationary mode.
Test tracking by moving your head and controllers slowly through the play area. Make sure the cameras or sensors can see the controllers and that mirrors, strong sunlight, or flashing lights are not disrupting tracking. Route any cable behind you with enough slack to turn, but keep it away from your feet.
Tip: Recreate the boundary whenever you move furniture, change rooms, or switch between seated and room-scale play.
Check: The boundary appears in the headset in the right place, and the headset tracks your head and controllers consistently.
Step 6: Choose and configure a first game
Select a game labeled as compatible with your headset and platform. For a first session, choose a game with a comfort rating or movement option that suits you. Install it, then open its settings before playing. Select seated or standing mode to match your setup, set turning to snap or smooth movement according to your comfort, and choose teleport movement if smooth locomotion makes you uncomfortable.
Set graphics or streaming quality to a level your system can handle smoothly. If the game offers height calibration, stand or sit in your normal play position and follow the prompt. Keep the first session short so you can judge comfort before committing to a longer game.
Tip: High graphics settings are not worth stuttering or dropped frames. Lower quality or resolution if movement looks uneven.
Check: The game launches, recognizes the controllers, and shows the correct view and movement mode for your play position.
Step 7: Test comfort and gameplay before a full session
Play a simple section for five to ten minutes. Check that the image remains clear, the audio works, controller buttons respond, and the boundary appears when you approach its edge. Keep your movements small at first and avoid fast spinning or intense locomotion until you know how your body responds.
Pause and remove the headset if you feel nausea, dizziness, headache, eye strain, or pressure pain. Take a break in a well-lit room, drink water if needed, and resume only when you feel fully comfortable. Adjust fit, IPD, movement settings, or game intensity before trying again.
Tip: Comfort differs from person to person and from game to game. Stop at the first signs of discomfort rather than trying to push through them.
Check: You can complete a short test without pain or motion discomfort, and the controls, tracking, boundary, and image behave as expected.
Common Mistakes to Avoid
- Buying a headset or game without checking platform compatibility. — Confirm the exact headset model, supported system, connection requirements, and game platform before purchase or download.
- Setting the boundary too close to furniture or other hazards. — Clear the space first, leave a buffer, and test the boundary while moving slowly before starting active gameplay.
- Tightening the strap to fix a blurry image. — Recenter the headset and adjust lens spacing or IPD first. Tighten only enough to keep the display steady.
- Playing through nausea or eye strain. — Stop and remove the headset as soon as symptoms start. Shorten sessions and use seated, snap-turn, or teleport options where available.
Troubleshooting
Problem: The headset is not detected by the computer or console.
Solution: Check that the system supports the headset, then reconnect the cable to the correct port and confirm the headset is powered on. Restart the official headset app and the computer or console. Replace a damaged cable only with a compatible one, and check the maker’s support instructions if the device still does not appear.
Problem: The display looks blurry or gives you eye strain.
Solution: Reposition the headset so the lenses line up with your eyes, adjust the lens spacing or IPD if supported, and use the headset’s text or fit test. Clean lenses only with the recommended dry microfiber cloth. If you wear glasses, check that they fit without pressing on the lenses; stop if discomfort continues.
Problem: Tracking drops or controllers jump around.
Solution: Check that tracking cameras or sensors have an unobstructed view, charge or replace controller batteries, and remove objects that block the tracking area. Reduce direct sunlight and reflective surfaces near the sensors. Restart tracking setup and redraw the boundary if you changed rooms.
Problem: A game stutters, disconnects, or makes you feel unwell.
Solution: Pause and remove the headset if you feel unwell. For performance problems, close other demanding apps, lower the game’s graphics or streaming quality, and check wired connections or network strength. Restart the game after settings changes, then test briefly with a less intense movement mode.
What Success Looks Like
Your headset launches a compatible game, displays a clear and stable image, tracks your head and controllers reliably, and shows a correctly placed play boundary. The headset fits without painful pressure, and you can complete a short test session without motion discomfort. You know how to pause, remove the headset, and adjust the game’s comfort settings.
Next Steps
After the test, save the headset fit and play-area settings if your device supports profiles. Charge controllers, store the headset out of direct sunlight, and keep lenses clean with the maker-approved method. Increase session length gradually and take breaks; stop playing whenever discomfort returns. Redraw the boundary after moving the setup, and check for game or firmware updates before troubleshooting recurring issues. Contact the headset maker for persistent hardware faults or pain that continues after removing the device.
Frequently Asked Questions
Do I need a gaming PC to use a VR headset?
Not always. Standalone headsets run supported games on the headset itself. Other models require a compatible PC or console. Check the exact model’s requirements before buying games or accessories.
How much space do I need for VR gaming?
The required space depends on the game and headset. Seated and stationary games need less room than room-scale games. Follow the headset’s boundary prompts, clear hazards, and leave enough space to move without reaching nearby objects.
Can I wear glasses under a VR headset?
Many headsets accommodate some glasses, but fit varies. Check the maker’s glasses clearance and use its spacer if supplied. Do not let frames press against the headset lenses; prescription inserts are another option if supported.
How can I reduce motion sickness in VR?
Start with short sessions and games with limited movement. Use teleport movement or snap turning if available, and avoid playing when tired or unwell. Remove the headset when symptoms begin rather than continuing through them.
Fall Picks
fall essentials
As an affiliate, we earn on qualifying purchases.