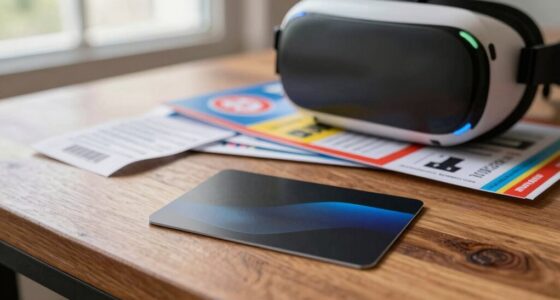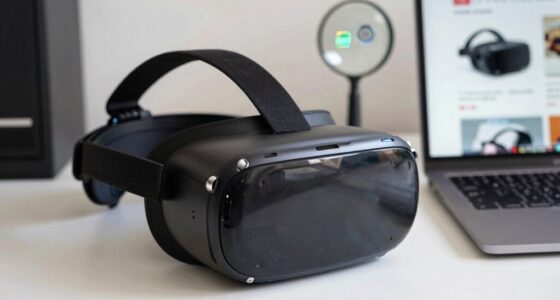

When you unbox your VR gear, start by checking straps, cushions, and adjustable parts for tears or damage. Look closely at lenses and displays for scratches, cracks, or smudges that could harm your vision. Inspect all cables for frays or exposed wires, making certain connection points are secure. Power on the device to test responsiveness and watch for unusual sounds or errors. For detailed tips on uncovering hidden issues, keep exploring how to guarantee your gear is fully ready.
Key Takeaways
- Examine straps, cushions, and adjustable parts for tears, misalignment, or damage to ensure a proper fit.
- Inspect lenses and display surfaces for scratches, cracks, or smudges that could impair vision.
- Check all cables and connection points for frays, cuts, or loose connections to prevent connectivity issues.
- Review the device for any signs of impact damage or wear that might affect performance.
- Power on and perform a quick functional test to identify any unusual sounds or operational irregularities.

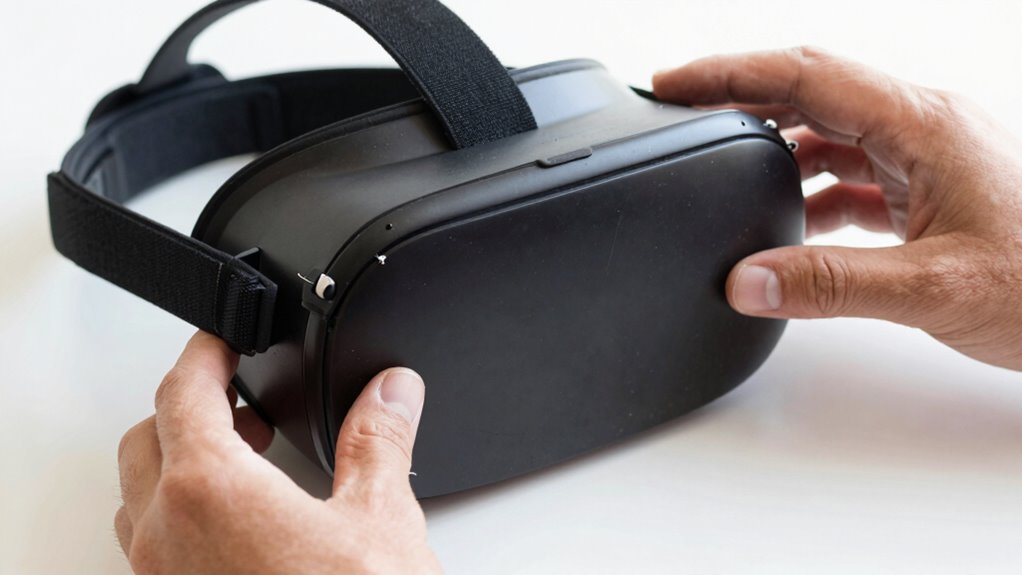
Virtual reality gear might look fine on the surface, but hidden damage can compromise your safety and performance. When you unpack your new VR headset, it’s tempting to just jump right in and start gaming or exploring virtual worlds. However, taking a few minutes to thoroughly inspect your device can save you headaches down the line. The first thing to focus on is the virtual fit—ensuring that all straps, cushions, and adjustable components are intact and properly aligned. A snug, comfortable fit is essential for immersive experiences and to prevent discomfort or accidental slips during use. Check each strap for tears or loose buckles, and verify that the foam padding isn’t compressed or damaged, as these issues can cause pressure points or reduce comfort.
Next, carefully examine the lenses and display areas. Look for scratches, cracks, or smudges that could impair your vision or cause eye strain. Even minor damage to the lenses might not be immediately obvious but can considerably affect picture clarity. If you notice anything unusual, don’t ignore it—contact the manufacturer or seller to understand your warranty coverage. Many companies offer warranties that cover manufacturing defects or damage during shipping, but hidden damage might not be obvious until after extended use. Knowing your warranty details allows you to address issues promptly, whether through repairs, replacements, or refunds.
Beyond visual checks, inspect the connection points and cables. Ensure that all cords are free of frays, cuts, or exposed wires. Loose or damaged cables can lead to intermittent connectivity or complete failure, which hampers your VR experience. If you find any issues, document them with photos and reach out to customer support. Many manufacturers’ warranty coverage includes repairs for internal or structural damage that isn’t visible immediately but affects functionality. Being aware of your warranty coverage helps you avoid unnecessary expenses and ensures you’re protected if problems arise after unboxing.
Finally, test the device briefly before diving into longer sessions. Power it on, check for any unusual sounds, and verify that tracking sensors and controllers respond correctly. If anything feels off, don’t disregard it. Modern VR gear often incorporates adaptive technology and sensors that learn and adjust to your movements, so early detection of issues can prevent calibration problems later. Addressing potential hidden damage early on can prevent more serious problems later, and understanding your warranty coverage ensures you know your options for repairs or replacements. By taking these steps, you’re making sure your VR gear is safe, comfortable, and ready to deliver the immersive experience you’re after—without the surprises hidden just beneath the surface.
Frequently Asked Questions
What Are Common Signs of Internal Damage in VR Headsets?
You should look for signs of internal damage in your VR headset, such as unusual fogging or dead pixels on the display. Check for cosmetic wear or scratches that might indicate rough handling. Also, examine the packaging for damage, which could have caused internal issues. If you notice any loose parts, strange noises, or inconsistent display quality, it’s a sign that internal damage might be present.
How Can I Test the Tracking Accuracy Immediately After Unboxing?
Imagine your VR headset as a compass pointing true north. To test tracking accuracy, start with calibration procedures, ensuring sensors are aligned. Then, follow the manufacturer’s instructions for software updates, which fine-tune performance. Move your head smoothly in different directions, watching for lag or jitter. If the cursor or visuals stay steady, your tracking’s precise. If not, revisit calibration or update software to restore accurate, seamless movement.
Is There a Way to Detect Battery or Power Issues Quickly?
You can quickly detect battery or power issues by checking the device’s power indicator. Make certain it lights up or shows a charging icon when connected. Also, monitor the battery health through the VR headset’s settings menu, if available. If the power indicator stays off or the device struggles to turn on, it signals potential battery or power problems. Always test the device on a full charge to guarantee ideal performance.
What Should I Do if the Lenses Appear Scratched or Foggy?
If your VR lenses look scratched or foggy, start by gently cleaning the lenses with a microfiber cloth designed for lens cleaning. For foggy lenses, try using a lens cleaning solution or a soft, damp cloth to remove moisture and fog. To prevent future fogging, consider using anti-fog sprays or wipes. Always handle your VR gear carefully to avoid scratching and make certain clear visuals during use.
How Can I Verify the Integrity of the Cable Connections?
Think of your VR gear’s cable connections as the backbone of your immersive experience. To verify their integrity, gently tug each cable at the connection points, ensuring they stay firm like a steady heartbeat. Check for bent pins or frayed wires—these are warning signs of compromised cable quality. Test connection stability by powering on your device and moving the cables slightly; if the display flickers or disconnects, it’s time to replace or tighten them.
Conclusion
Once you’ve thoroughly inspected your VR gear, you’re like a detective uncovering hidden clues, ensuring everything’s in top shape. Catching damage early is your shield against future frustrations. Remember, a quick check now can save you hours of troubleshooting later. Trust your eyes and touch—think of it as giving your new device a gentle handshake, welcoming it into your virtual adventures with confidence. Stay vigilant, and your immersive experience will be smooth as a calm lake.